
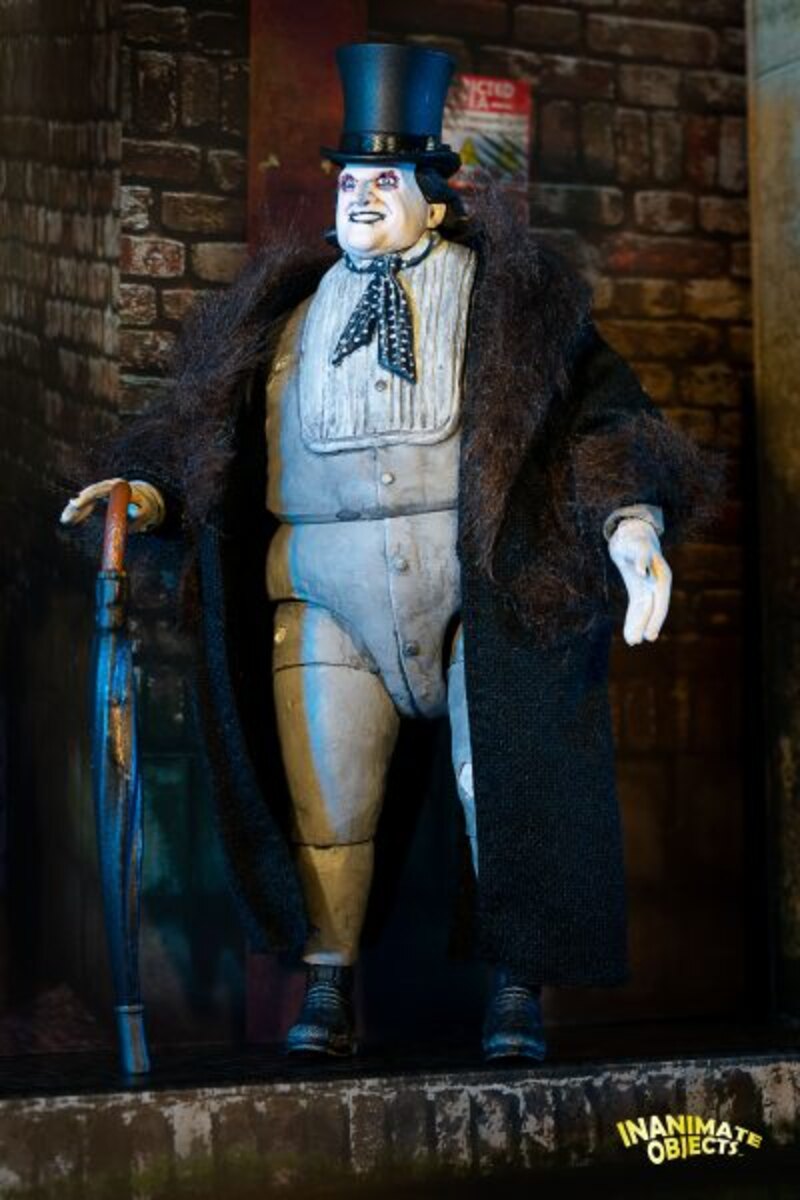
For Penguin, using the Mattel offering, I removed the coat and the too-thick vest. Much has been said about how old Oswalds noggin is too small on Mattels figure, and that is an accurate assessment. But it seems less offensive once that vest is off. I then proceeded to mash Magic Sculpt epoxy into the etched lines of the pants, mindful to maintain articulation. I also Dremeled down some shirt details, and then shaped the bib front and tie from epoxy.
Regarding the boots, I trimmed away the lower pants legs, while keeping the leg inside. (This required creative use of blades and Dremel sanders.) In the end I maintained the ankle joints without having to break the legs and rebuild.
I also solved a problem present in Mattels original figure. I embedded small magnets in Penguins skull and the hat. Now the hat stays on!
Penguins fur coat is supposed to be a green crushed velvet, and its more of a great cloak. But I was not about to make a coat from scratch when a perfectly usable one was already present. I bought some genuine Wookie fur, trimmed it down to scale, and cut appropriate strips for the collar, sleeves, and pockets. I used Tandys Tanners Bond to adhere the fur. (Its a contact cement that maintains flexibility. Its used on Muppets.)
Penguins on-screen duck in Batman Returns is a very specific shape. The duck I acquired was far more generic. The only way to be completely screen accurate would be to sculpt an entire duck from scratch, which I was not about to do. I aimed for suggestive rather than full screen accuracy. As such I left the open bill and the lowered wings as is. (I would love to have opening door wings, but again, that would require starting from nothing.)
I covered and filled in the existing eyes with Magic Sculpt epoxy. I then used the same epoxy to build up eyes on the sides of the head, and the cheeks. These things alone suggest the screen duck design more than anything else.
To start the cockpit, I drew the opening along the back, and then cut it out with a matte knife. I should mention here that the duck, being vinyl rubber, does not hold a perfect shape. Even heating it with a hair dryer could not yield a symmetrical duck. So I did the best I could with the shape at hand. The duck continues to change shape, depending on room temperature, the weight of any figure inside it, and even the surface it rests on.
The cockpit itself is made from illustration board. I attempted to match the contours of the ducks body. At one time, the box lined up fairly well to the duck. As you can see, by the time the photos were taken, the box sticks out a bit. If I could do it again (Im not!), I would make the cockpit from thick styrene, and try to wedge and adhere the edges to the inside of the duck, thus forcing the vinyl to hold a more consistent shape. The steering wheel and gear shift are made from bits of fodder. Theres also a seat cut from illustration board that is removable for characters of greater girth. (Looking at you, BTAS Penguin.)
For the wheels and chassis, I found a set of dirt cheap monster trucks at Walmart. A pair of trucks yielded eight wheels with tires the appropriate size, and cost all of $5. I removed the truck bodies, exposing the shocks and other working parts. I liked this look, and ultimately kept it, choosing not to replicate the circus box the screen duck rests on.
Of course, one truck consists of only four wheels, and I needed six. Removing a pair of wheels and the axle from one of the trucks was a chore, but I managed. I then used styrene to build an extension to the chassis, fitting the third pair of wheels to the rear. I found some cheap gaming discs on Amazon that were exactly 1″ in diameter, matching the size of the wheels inside the tires. I glued those discs to the wheels.
The whole wheel structure is then glued to a thick styrene sheet. Attached to the sheet are also six strong, ceramic magnets that pair up with magnets glued inside the duck. Thus the duck with attach to the chassis, but can be easily separated for water scenarios, such as the duck appeared in Batman: The Animated Series. (Im reasonably certain this thing wont actually float anymore.)
I created the dashboard, the wheel art, and the eyes as vector art. Ive made the art available for your use in the downloads section.
Painting and weathering the duck was fun. One never knows how various forms of vinyl will react to paint and sprays, so I tested a shot of Dullcote on the discarded back of the duck that I cut out earlier. It seemed to dry just fine, so I applied Dullcote to the whole duck body. This gave the acrylic paint that would follow something to adhere to. While the duck itself was yellow, it was semitranslucent. Plus, the sculted additions needed to be painted. So I applied a few coats of yellow to create a consistent, opaque layer. This was followed by a wash of muddy browns. Once dry, I applied more yellow. Not so much as the previous coat, but not so thin as to be dry brushed. Finally, I used a tiny brush to apply various scratches.
Is it screen accurate? No. Is it evocative of the film duck? Absolutely. A unique addition to my Gotham Garage.
You did Tim Burton proud, my friend.
Great Job. I always wondered why Kenner didn't do one back in the day.


__scaled_800.jpg)


